In the case of completing forms or applications, sometimes it’s necessary to attach supporting documents in the same document; for instance, a driving license, copy of an ID, etc. Use DottedSign to request both the signature and required attachments in one document.
Follow the instructions below to assign the attachments.
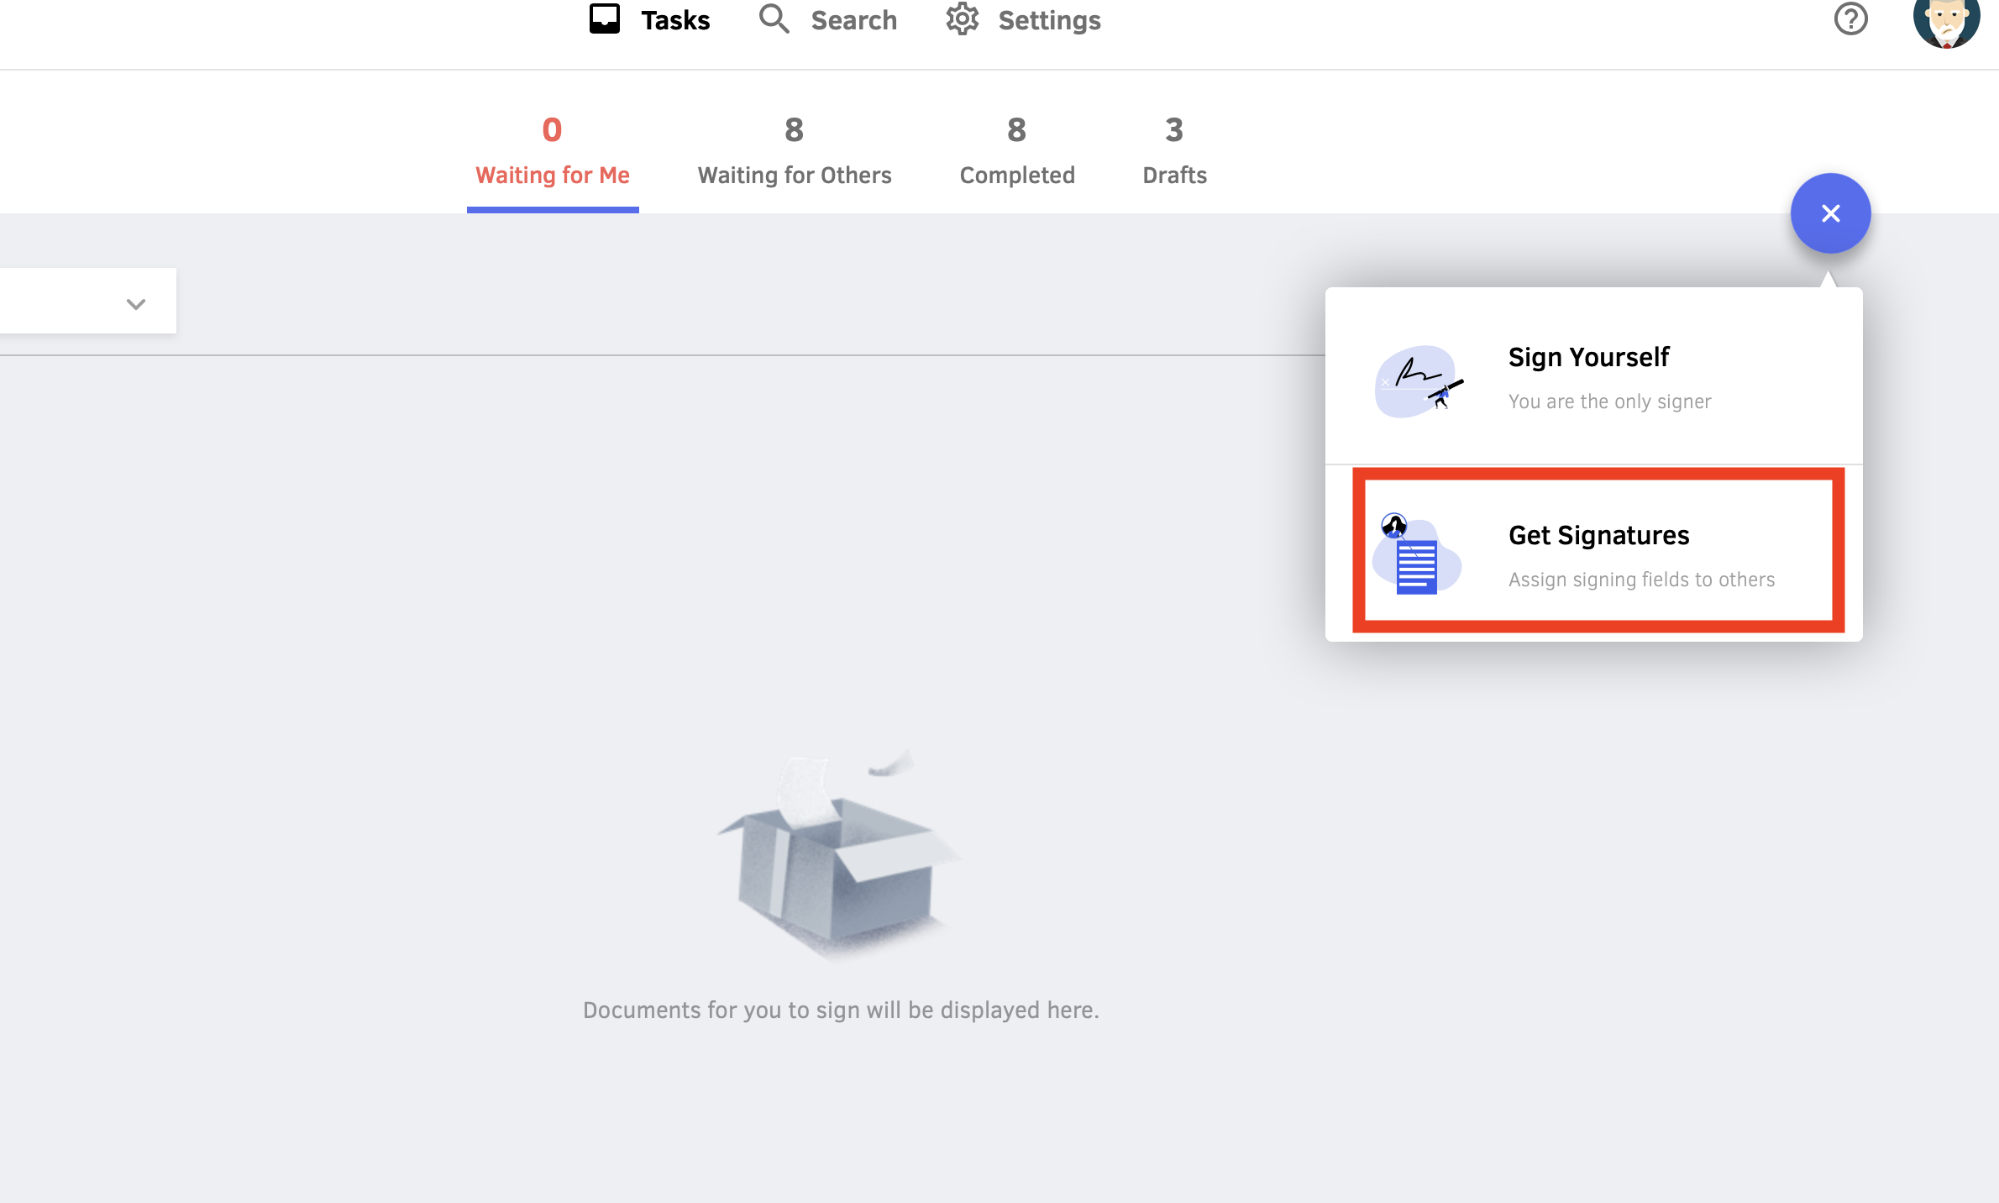
1. Click “+” to create new tasks, and choose “Get Signatures”.
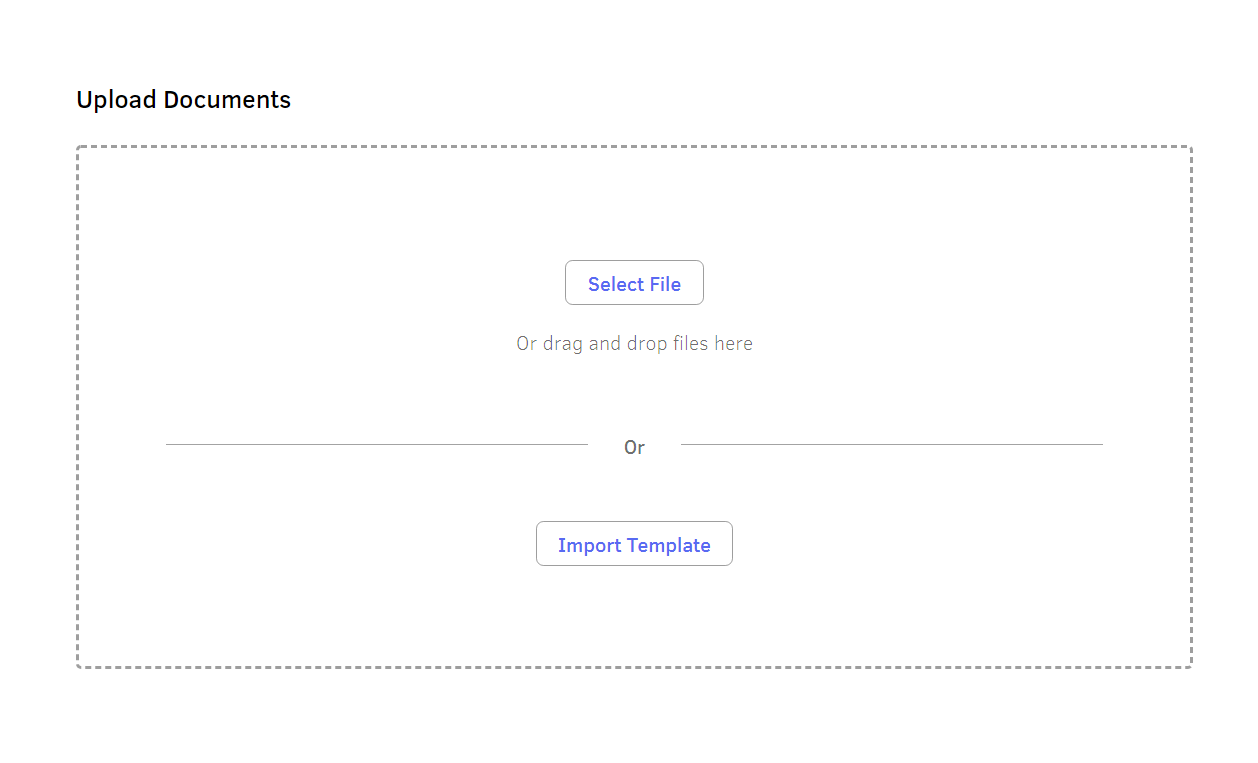
2. Import documents to sign from your local file location or cloud-based services. You can also choose from “Camera”, "Photo," or "Browse” to import documents if using DottedSign on your mobile devices to sign. You can also import or create a template (visit this article to learn how to create reusable templates).
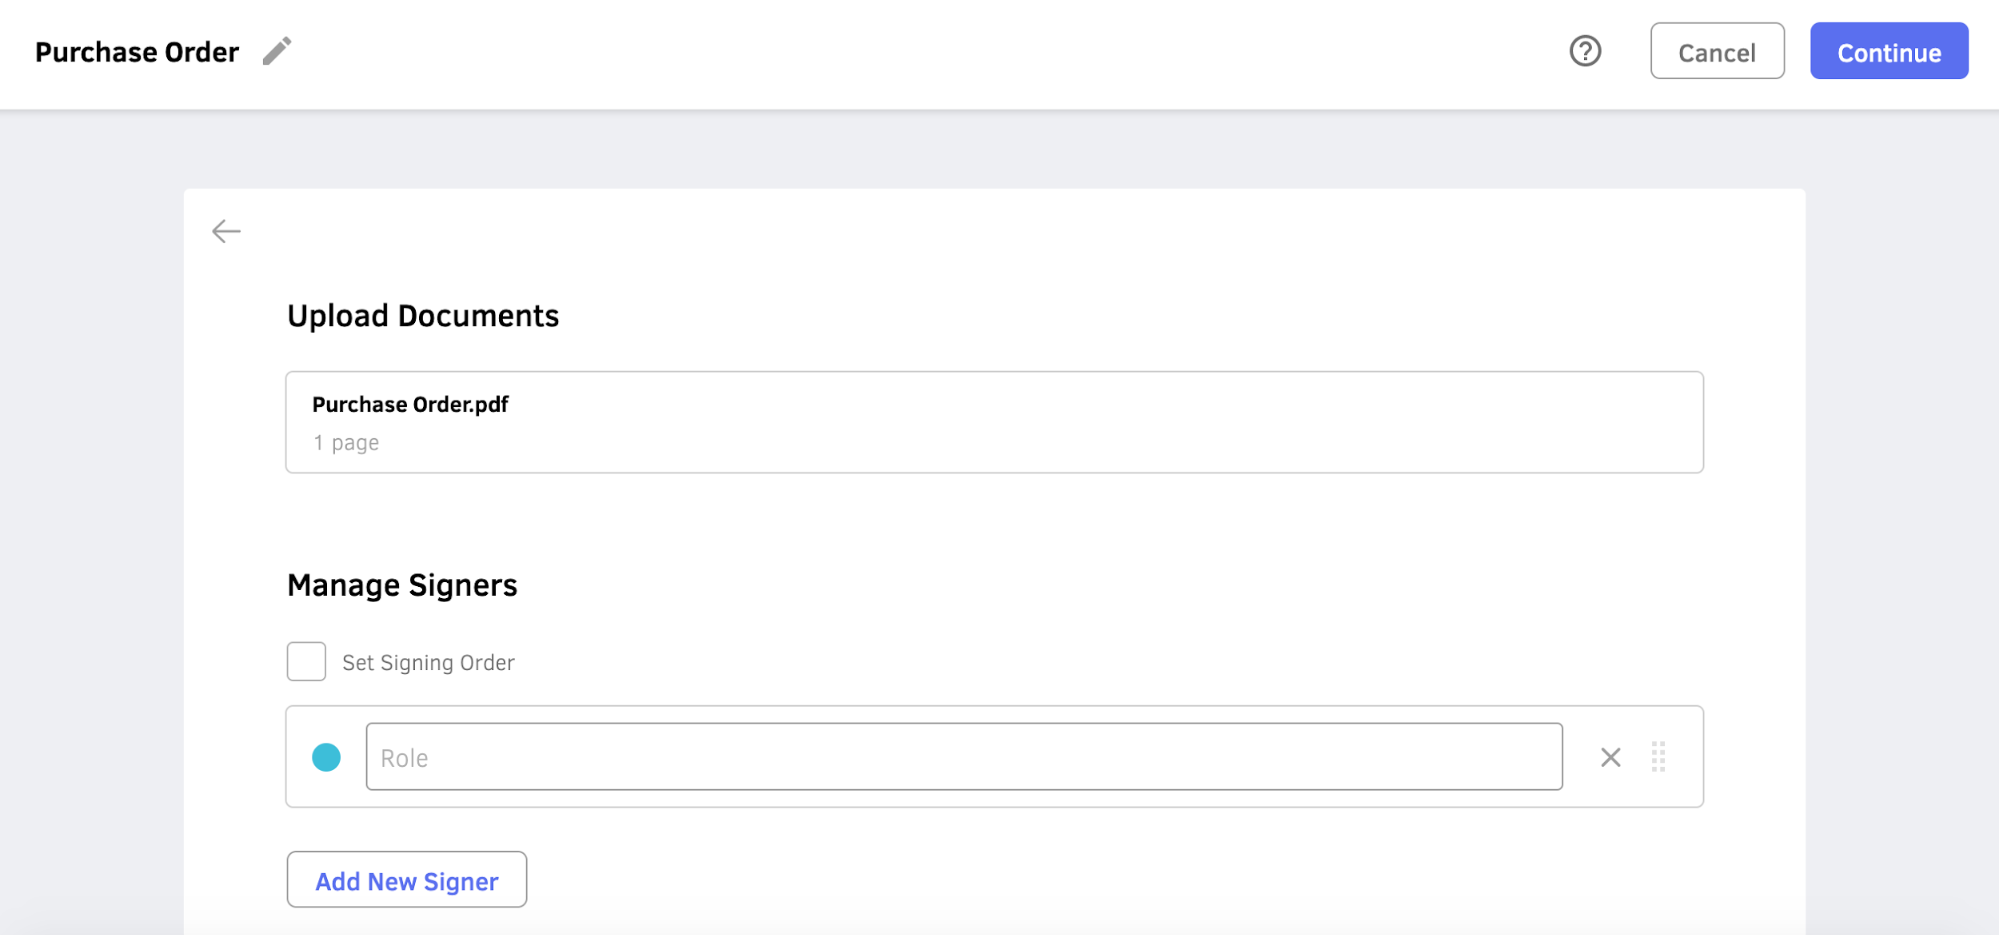
3. Fill in the name and email address of one or more signers. Then, click Continue.
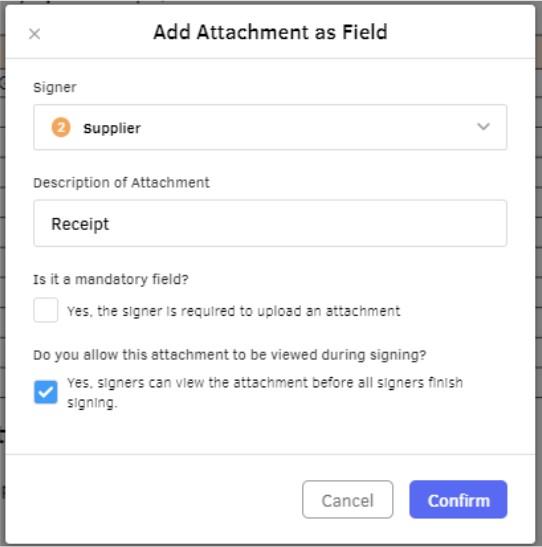
4. Click “Add” under the Attachment section.
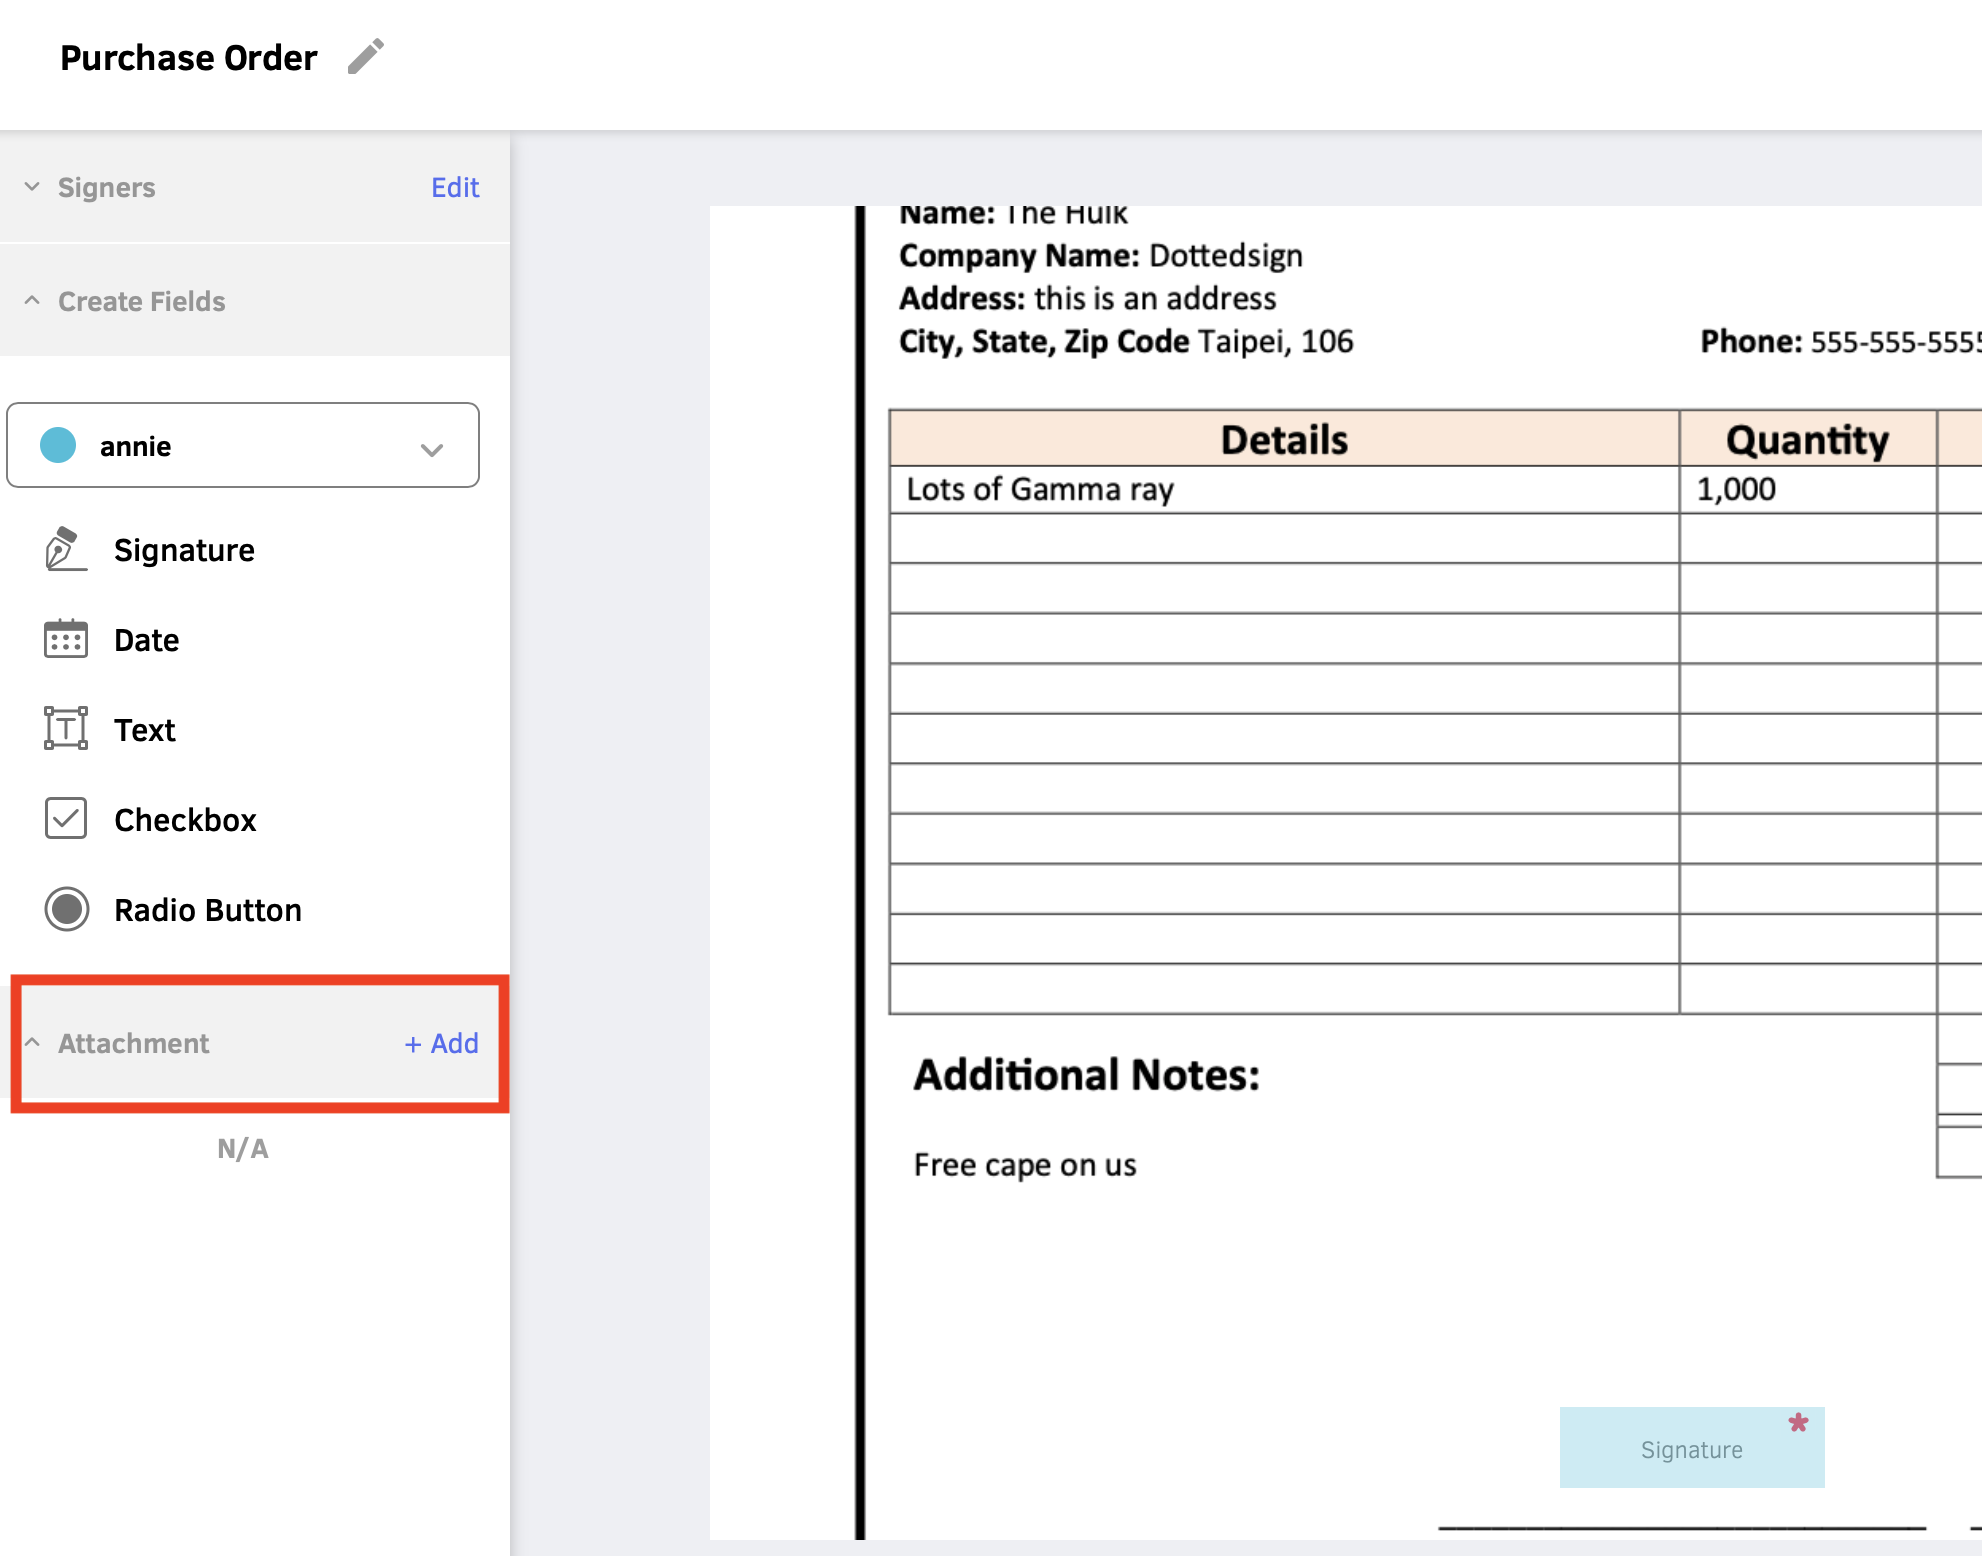
5. Add a description to the attachment. Click “Confirm”.
* Advanced setting: You can decide whether to set it as a mandatory field (Available in DottedSign Pro & Business). Also, you can also make it available to view during the signing process. (Available for DottedSign Business). Click here to claim a free trial with any of the premium plans.
6. Move onto "Review and Send". You can then review your signer's permissions and manage attachment viewing permissions.
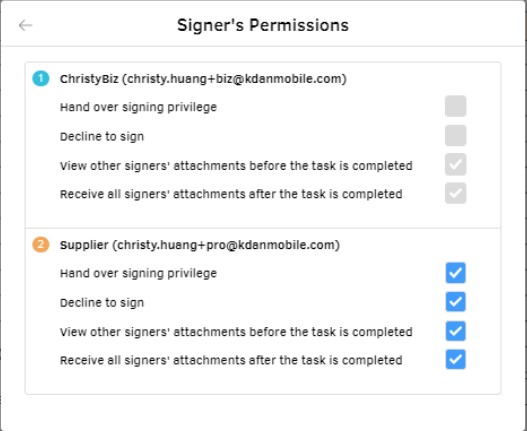
7. As the Sender has set up the permissions, the signers will be able to view and download the attachment during the signing process. They can also download from the "Completed" tasks tab in DottedSign. Alternatively they can access through their signing request emails.
Updated